This post derives from the SiteKickr Blog post "PhoneGap/Cordova and iAd integration." I got stuck in a couple of spots and decided to attempt to lend a little clarity for anyone else seeking a solution. I've also taken a couple of the comments from that post and integrated here.
1. Click on the "Project Navigator" icon in the left most panel in XCode.
2. Click on the top-most item in your hierarchy.
3. Click on the Build Phases tab.
4. Expand "Link Binary with Libraries."
5. Click the + icon to add the iAd.framework to your project.
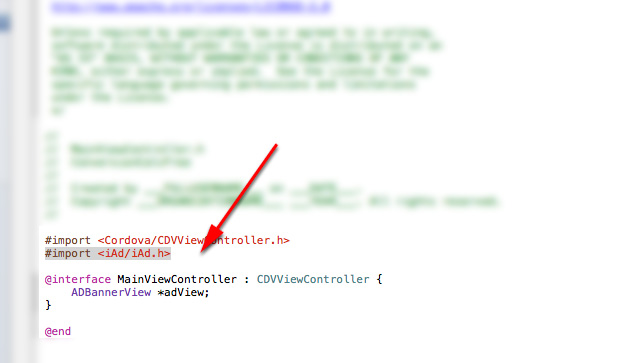
6. In your App -> Classes folder, open up MainViewController.h, and drop in the following code after any existing #import statements but before @end:
 #import <iAd/iAd.h>
 @interface MainViewController : CDVViewController {
   ADBannerView *adView;
 }
7. Open up MainViewController.m
8. In your viewDidUnload method, which should already exist, add:
[adView release];
9. In your webViewDidFinishLoad method, add the following just before:
"return [super webViewDidFinishLoad
:theWebView];"
   adView = [[ADBannerView alloc] initWithFrame:CGRectZero];
   CGRect adFrame = adView.frame;
   if([UIApplication sharedApplication].statusBarOrientation
     == UIInterfaceOrientationPortrait
     || [UIApplication sharedApplication].statusBarOrientation
     == UIInterfaceOrientationPortraitUpsideDown) {
     adView.currentContentSizeIdentifier =
       ADBannerContentSizeIdentifierPortrait;
     adFrame.origin.y = self.view.frame.size.height-adView.frame.size.height;
   } else {
     adView.currentContentSizeIdentifier =
       ADBannerContentSizeIdentifierLandscape;
     adFrame.size.width = adView.frame.size.width;
     adFrame.origin.y = self.view.frame.size.width-adView.frame.size.height;
   }
   adView.frame = adFrame;
   [self.view addSubview:adView];
10. If you don't already have a willAnimateRotationToInterfaceOrientation method, add it, and drop in the following code:
   BOOL hide = (newInterfaceOrientation == UIInterfaceOrientationLandscapeLeft || newInterfaceOrientation == UIInterfaceOrientationLandscapeRight);
   [[UIApplication sharedApplication] setStatusBarHidden:hide withAnimation:UIStatusBarAnimationNone];
   CGRect mainFrame = [[UIScreen mainScreen] applicationFrame];
   [self.view setFrame:mainFrame];
   if (newInterfaceOrientation != UIInterfaceOrientationLandscapeLeft && newInterfaceOrientation != UIInterfaceOrientationLandscapeRight) {
     adView.currentContentSizeIdentifier = ADBannerContentSizeIdentifierPortrait;
     [self.view bringSubviewToFront:adView];
     adView.frame = CGRectMake(0.0, self.view.frame.size.height - adView.frame.size.height, adView.frame.size.width, adView.frame.size.height);
   }
   else {
     adView.currentContentSizeIdentifier = ADBannerContentSizeIdentifierLandscape;
     [self.view bringSubviewToFront:adView];
     adView.frame = CGRectMake(0.0, self.view.frame.size.width - adView.frame.size.height, adView.frame.size.width, adView.frame.size.height);
   }
A couple of points of note regarding ad placement:
- iAd is not like Adwords or Admob. Ad placement is not done in your HTML and does not use your javascript or CSS.
- By default, the ad will be placed on the bottom of your app's UI. To change the position of the ad, you'll need to edit all instances of the value of adFrame.origin.y to equal 0 (adFrame.origin.y=0).
- After you're done and ready to deploy, you'll need to enable iAd in your application through iConnect. Keep in mind you can only do this AFTER you upload your app.
- Log in to iTunes Connect
- Click on "Manage Your Applications"
- Click on the App you want to enable iAd on.
- Click on the blue "Set Up iAd Network" button.
- Follow the instructions.
That's it! Good luck.
UPDATE 03.06.2013: Check out this great response at StackOverflow regarding not showing the ad placeholder if an ad is not delivered: http://stackoverflow.com/a/14764349/2037540
UPDATE 04.17.2013: Brandon Hawkins has come up with a great solution to deal with the issue of the ad frame setting on top of the webview. Check it out here: http://hawkinbj.wordpress.com/2013/04/16/implement-iad-banner-ads-without-covering-uiwebview-in-phonegap/